
Physician
Web Solutions Fast Track Site Building Steps
Important:
You
do not need to save your work because everytime you make a change the sitebuilder
will save the changes for you.
After
editing, publishing and viewing - to get back to editing the website, close
the window X in the upper right hand corner.
These
steps are intended to help you get your site up and running quickly. If you
want more detailed instructions please refer to the Table of
Contents in the bottom left hand of the page in your Site Editor.
Please
turn off your pop up blocker. Pop ups will only be allowed when using the
Site Builder. If you cannot login to the Site Builder it can be because your
pop up blocker is enabled.
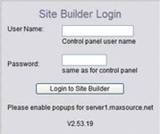
| 1.
Login
to Site Builder using the link from your Welcome Email.
|
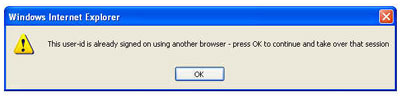
| 2.
If you get a message that says User signed into another browser just
click OK and it should take you into the site builder.
|
| 3.
Choose 1st drop down box (All Groups) and select "Medical".
The
other 2 drop down boxes are optional (All Topics & All Colors)
|
| 4.
Click on the Template of your choice. You may choose to change your
template later as many times as you want.
|
| The
Easiest Way to Change Pictures
Double
click on the picture that already exists in the website and it will
open up a page that will take you into the graphics window. Double
click on the folder in the left column that says “Healthcare Photos”
and then select a folder of your choice and then a picture of your choice.
Click once on the picture until you see it in the right hand window
and then click OK.
Please note: None of the header templates in the websites are editable,
only the pictures that you see in the pre written text area of the site.
Align
your pictures with your text by choosing one of the above boxes in your
Text Editor Tab.

|
|
| Table
of Contents
When
you need additional information you can click the Table of Content links
at the bottom left hand of the page in the Site Editor. (under the asterik
*)
|
|
Editing
Text

On the 'edit text' tab, you can add and modify the contents of
text boxes by simply selecting text with the mouse and typing. You
can also change pictures by double clicking on them. A number of the
icons and options on the toolbar are similar to those found in most
word processing software. Below are the options unique to this
site builder.
| Text Style
Cutting & Pasting from Microsoft Word or other external applications |
Change the text style for the paragraph. The text style
includes a font, font size, text color and decoration.
These style attributes are pre-defined in the style sheet.
With some versions of the site builder you may change the style
sheets.
 When cutting and pasting from Microsoft
Word or other applications: When cutting and pasting from Microsoft
Word or other applications:
1. Copy the text you want to paste into the
Sitebuilder into your clipboard (Ctrl C).
2.
Position your cursor or select the text you want to replace in
your page.
3. Click the Import Data from Other Applications button.
4. A dialog will appear that tells you to press Ctrl V. Press
Ctrl v and your text will paste into the blank page and then into
your page.
Remember
you cannot paste images into your page from an external application
- only text. |
| 
|
Change the text color to one of the predefined colors in the
palette. In some versions of the site builder you may actually
change the pre-defined colors in the palette. |
| 
|
Insert a symbol such as copyright or trademark into the text |
| 
|
This button is only enabled for form boxes. You may change
the email address for the form, insert new form fields or change
the name of form fields using this button. |
| 
|
 |
Creating Hyperlinks
Highlight the text you want to link and press the button that looks like a chain link (to the far
left). In this example you are linking to the Free
Consultation.
After
highlighting the text, double click and you will see the
next screen below.
|
 |
Highlight the page in the
left column that you want to link to (in this case it
is the Contact Us page) and then click Ok. The page you
are linking to will now show up in the window so that
you can verify it's the correct page.
|
Hyperlink
to an External Web Page: Link to a page on the World Wide Web.
Highlight
the External Web Page and type your www address in the space in
the gray area to the right.
Leave
Show in Current Window and click Ok. Your external website will
show up in the window below.
|
| 
|
Inserts a new image into the text using the Image Organizer. If
you first select an existing image that is embedded in text you
will be able to change that image with the image organizer. Double
clicking on the image is a short cut for pressing this button.
The image will be left aligned at first but you may change the
alignment using the alignment buttons.
To turn off alignment and let the image float within the text,
click the depressed alignment button so it is unselected. |
| 
|
Inserts a new table. If the
cursor is positioned within a table, this button is used to modify
the existing table. |
| |
|
|
Help
Desk: 770-893-2797 10AM - 6PM EST
Email:
help@physicianwebsolutions.com